Postcards – Black

  • All Pricing includes Printing, Postage, and Entry into a USPS Plant
  • All Postcards Exceed USPS Requirements
  • All Postcards include Accutrace Tracking

Configure & Price

×

Upload files*


You can upload multiple lists (xls, xlsx & csv files only).
Download Sample.

Upload design

← Back to option

How would you like to design your Postcards - Black

Upload a full design

  • - Have a complete design
  • - Have your own designer

Design here online

  • - Already have your concept
  • - Customise every detail
×


Fastest Delivery - 100% satisfaction guaranteed
Calculate shipping price

Please fill in the fields below with the shipping destination details in order to calculate the shipping cost.

Paper & Specs

Make a Statement with Different Sizes:

  • Standard 4.25″ x 5.50″
  • Jumbo 5.5″ x 8.5″
  • Super Jumbo 6″ x 9″
  • Panoramic 5.5″ x 11″
  • Panoramic Wide 6″ x 11″
  • Giant 8.5″ x 11″

Durable-High Quality Paper Stock:

  • 12pt Premium Coated Paper
  • 14pt Premium Coated Paper
  • 16pt Premium Coated Paper
We know the presentation your card makes is important upon arrival. All of our paper selections exceed USPS requirements. They also will help provided the best overall protection withstanding potential damage from USPS processing – depending on where your postcards are headed – they may be processed on 2-4 machines and travel in trucks, planes, and/or containers. We do carry over 20 other postcard suitable papers and can obtain just about any paper next day from our mill partners. If your looking for something to meet your requirements send us a note!

Add Additional Coating:

The paper mills provide coated paper, however it has no real gloss or matte/silk finish, unlike text of book paper we are using heavier caliper weight card/board stock. We offer (3) additional coatings that enhance the finish look and feel to one or both sides of your card.
  • Gloss UV Coating – Adds a glossy sheen and helps in the reduction of smudging or scratches that can occur on postal processing equipment.
  • Matte UV Coating – Almost the opposite of the above, this enhances a duller appearance and reduces the reflection of light off the card.
  • Soft Touch UV Coating – Creates a velvety texture. The paper becomes “soft” to the touch and increases the tactile appeal.

Why Choose Us?

Visibility, attention to detail, marketing and presentation are everything in the real estate market. If you want to sell properties, get more listings, and ultimately boost sales and brand then you will need to deploy all channels of marketing. Your marketing strategy maybe critical to helping you sell a home, but it is even more critical to your clients.

List & Data Platform7 ways to build your mailing lists!

Integrated directly into our direct mail postcards. You can upload and manage your lists in your account. You can also build your mailing lists using these tools:
  • Map My List
  • Closest Relevant Homes (waybetter than radius!)
  • Subdivisions & Condo Buildings or Apartment Rentals
  • Advanced Real Estate Filters
  • Absentee
  • Lifestyle
  • Length of Residence – more!

Quality & Turnaround

Using state of the art digital printing presses with integrated servers that allow for “Direct to Print”- Variable Data, we produce a high quality printed addressed postcard, that then can be processed through any of our automated finishing systems. No need to use three or four production steps anymore. Most Campaigns Are in the USPS mail stream within 24-36 hours

USPS on Site Processsing

Utilizing the entire USPS database and (4) others electronically and on-demand, your mail is verified, processed, validated and postage is paid at our facility. We are certified by the USPS to preform these services. We then transport your campaign in postal containers directly to one of 5 processing plant or to a local delivery post office (our truck or PPOM) that corresponds to your mail.

Tracking

We place our own unique serial number for each postcard within the USPS barcode. As your mail is processed on various machines or transported by the USPS, itis scanned. These scans are all individually uploaded to our server and there, compile within your individual job to produce a history and profile for each piece of mail that can be filter in over 145 ways. There are some limitations based on the class of mail, but most Ask About our AccuTrac Guaranteed Delivery.
Upload My Own List - Complete Details

Upload My Own List – Complete Details

List/Data Type
We prefer lists to be uploaded/submitted in one of the following common formats: .CSV | .TXT | .XLS or .XLSX | .DBF ** Please do not submit any Apple number files if possible. Instead export as CSV from your Mac/Apple device. We do accept formats other than those listed above, however, additional time and fees may apply if it's necessary to adjust or manipulate your data. If you're unsure about your mailing list or have questions on exporting from your CRM, feel free to contact us.
Your File Names
File names should not have any of the following:

Spaces (use " _" rather than space if possible)
Special Characters (!,@,#,$,% etc)
Only 1 period(.)* that will be before the file extension name (see below)
Other Punctuation or Hyphens
* Your computer will automatically attach a .xxx (i.e. .txt, .csv, .dbf, etc.) to the file name. This is called the file's extension and is required. Please don’t remove or change this part of the file name

Format
You can download a sample file in this tab on the right. This format is built around an typical SOI based list. You can also use a simple format as well, see in the image below – First Name, Last Name, Address, City, State, Zip. Each address should be on a single row, with each element of the address in a separate column. If you have a secondary address - Apt/Condo/Unit # a column for that is fine if it is not already in the main address field.
Note: If your file has more columns don’t worry as long as you have the basics you are all set!

Save/ADD List(s) to Account
If you want to save that list you are uploading, for an order you can select > Yes. We will then add it to your My Mailing List so that it will be available next time in the “use My List on File” option
Note: You can also add mailing list(s) from the Top Menu > My Account

My Name Field
We do ask you to review the data in your name field as often we see data from various MLS services with a popular field know as “Owner Label” or “Mailing Label”. Often if you look closely at those names in that field, you’ll see about 20-40% of them are not formatted correctly or contain descriptions related to Trust or Multiple owners. We think using names is great! How using the wrong name or a poorly formatted name might not be the best impression to make. We provide you a few options.
Moved or Change of Address Records
We will process your list for the best possible delivery! A component in that process is matching your records/list with those that file filed a Change of Address Request with USPS as well as with a private database (Three major credit Bureaus). Then depending on your input we can Follow them to their new address or Replace with “Neighbor” or “Current Resident”. Or we can Remove them
Example
You have a SOI/Client List, and you sold a home to Bob & Wendy Smith. Their mail now goes to their new home so we would recommend you follow them and mail to their new address we obtained.
Your list is a Geo Farm or Neighborhood/Subdivision List, and an owner has moved. We would recommend that you don’t follow and instead leave the mail addressed to the address within your farm.

Duplicates
We can review your file for duplicate names. A common approach is when the name and the address are a match – Remove the duplicate(s). If there are two different names going to one similar address Bob Smith - Wendy Smith, we can Remove one of them or we can Merge the two names to a single record Bob & Wendy Smith. If there are multiple different names Bob Smith and Wendy Jones going to the same address we can merge as well keeping the 2 names but Merging into one record.
Friends and Family Script– We use a great many “data scripts” as we see various types of name and address configurations. This is a very advance method of not just removing duplicates, however analyzing multiple records with certain similar characteristics - then merging and identifying those that match..

Multiple List Upload
You can upload up to 4 lists for any single mailing. We will combine your lists and remove duplicates in the same manner as you selected above. If one of your lists is name with or similar to and SOI or Client List, those are what we refer to as the “Surviving Record”. Thus if that record or address is on a another list in your upload, then the SOI/Client List info for that record, is the one we will maintain.

File Specifications and Size for Upload Your Art File

Our Design Guideline templates tab will help you ensure your design/layout will meet all your expectations with regard to size and print ready bleed and safe area settings. You can down load a PDF template there or use the detailed below.

Basic Layout Instructions:
• Bleed: 1/8″ overall (.125 of an inch) will be trimmed off each side of your product. Your Final PDF file then should be .125” larger than the card you have selected. So a Jumbo Card is 5.5” Tall x 8.5” Wide. Your submitted file would be 5.75” Tall by 8.75” wide (added .125 to the left, right, top and bottom)
• Trim (cut) Line: This is where we will cut your card down from a much larger size press sheet to the final size that you ordered.
Borders- If you card has a border design, that border needs should be at least 1/4″ thick from the bleed line to ensure a balanced look
• Safe Area: This area is close to wear the card is trimmed to its final size.
Elements (i.e., text, graphs, tables) too close to or over the trim edge maybe trimmed further than you think due to manufacturing tolerances. Make sure no critical text or part of any image leaks into the Safe
Images bordering the trim should be expanded to the Bleed line so that that they “bleed” off the page

  • Images/Photos: CMYK @ 300dpi (1200dpi for Bitmaps) Hi Res Print - Not Web
  •  Flatten File: We recommend you flatted your final print ready card as you output the file. Especially if you are using transparencies or mask. This will assure that you exactly how your cards will look. Flattening at times can adjust all colors overall. All products we print are “Flattened”. This is part of our service so if you don’t flatten the card, it is fine, as we will at no charge. We just want you to beware that this can impact the entire card at times, based on how it was originally composed.

Print Recommendations “Print-Ready”

Print-Ready Files It a common term used every day in commercial printing, but it can mean different things. They are essential elements your file needs to ensure it translates from your computer to the printing press accurately and consistently without the need for any additional edits or adjustments. PDF Format Whether you’re designing a postcard, property brochures or perfect bound marketing booklets the first step in creating a file for online printing is knowing what format it’s in. A PDF is the best format. Other File Formats Other formats have broader editing capabilities, such as Adobe Photoshop (.psd format), Illustrator (.ai format) or InDesign (.indd/imdl). They can work however you have Package and Zip with Links and Font Folders and save as an IMDL otherwise they cannot be used. Formats like Microsoft Document (.docx), PowerPoint (.ppx) or Publisher (.pub) are not optimized for a printing press. And formats like .png and .jpeg. are static images that, if designed correctly, can be printed, but there will most likely be a charge to convert them. Nothing will advance however without your approval. Print-Ready File Requirements To ensure your file is ready for press and other online printing services, follow these guidelines: All of your images should be high resolution. We recommend images are 300 PPI for small format projects like booklets, cards or brochures, and 150 PPI for large format projects like custom signs and banners.

Make sure your files use CMYK colors for the most accurate comparison between what you see on your screen and what is produced with the press (not guaranteed to match exactly)

Your design files must have the appropriate bleed to ensure any variances in commercial production don’t affect your print. .125″ or 1/8″ variance in the event that the machines drift slightly in any direction. Because of this, your finished size should be expanded by 1/4″. Thus the final PDF file size for a 8.5×11 Brochure will actually be 8.75 x 11.25

Your design files should have all transparent objects, images or drop shadows flattened. PMS Pantone colors will be converted on the fly to CMKY unless for Signs and you have ordered PMS Colors.

General Rule As long as you have a PDF with high resolution images in the CMYK color space with the appropriate bleed, you’ll be on your way to creating the correct print-ready file and your own exceptional project!

What is My Mailing List?

My Mailing List is our list manager platform built to help you maintain your mailing list. It is Simple and Straight Forward. We do all the work! Before each mailing and/or every 60 days, these lists are processed for accuracy, duplicate addresses removed, vacant homes, known deceased, both NCOA (USPS Change of Address system) as well as PCOA (a private change of address registry we subscribe to via the 3 largest credit bureaus). We can also suppress any names you might have on your Do Not Mail list (if you use). You can easily remove contacts by contacting us through your account "My Account & My Mailing List". Create a new mailing list using our List Builder Platforms or Have Us Build a Custom List or Append records to you list- How long have they lived there, what is the LTV, Ages, etc...

  • Upload your SOI mailing lists have it cleaned, updated - Did someone move or pass away?
  • Add/Remove individual addresses to your SOI or Do Not Mail List
  • Choose multiple mailing lists for one mailer
  • Order List Insight - As your list is cleaned and processed for mailing, we generate possible leads - Vacant Homes, Deceased individuals and/or addresses in probate.
  • Have us append additional data or emails
Smudge or Scuff Marks

Why Do Some of My Mailed Postcards Have Smudges or Scuff Marks?

Your cards are printed correctly and all ink is dry however, USPS sorting machines may not be calibrated correctly or are set to handle a wide variety of mail thickness due to deadlines and/or maintenance. they can penetrate the postcard’s paper, ink and color toner leaving black smudges, burn marks, scratches, scuffing, rub marks, tears, and/or even rips.

These smudges and rub or scuff marks have been referred to as “postcard (or mail) survivability.” Meaning, how well does the postcard survive while traveling through the high-speed rollers and sorting systems of the United States Postal Service (USPS)?

If you receive or are informed that your card was “SMUDGED” it does not mean all the card you mailed were! In fact at times when you are added to a list (SEED CARD) and your address is outside of the targeted area or is in a less saturated geo area, the chances of smudging increase, however, most of the time the main targeted prospects cards - are not! This is due to more In-depth presorting at our plant and less need for USPS machines

DETAILS

Every day, the United States Postal Service delivers nearly half a billion pieces of mail. In order to do that, USPS processes 20.2 million pieces of mail every hour. To accomplish this mammoth task, the postal service relies on heavy-duty sorting machines, which grip and roll mail as they sort it into the correct zip code bins. Your direct mail may go through several of these machines on the way to its final destination. This equipment can sometimes leave scuff marks or toner behind. In more unusual cases, they may even crumple or tear mail.

Rubbing/Scuffing Contact Marks
When the postcards hit the USPS mail system, a machine orients the postcard (or other piece of mail) and cancels the stamp or postage indicia. At the same time, a digital camera captures the address and ZIP code from the postcard and assigns a fluorescent inkjet barcode and identification number.
Next, the postcard is passed through a Delivery Bar Code Sorter (DBCS) system. Depending on how far the mail piece has to travel, it may be processed by four to six different DBCS machines along the way to its final destination (local post office). These sorting machines are made up of a series of belts and rollers that sort the mail based on outgoing ZIP codes. The black rubber belts and rollers are typically the culprits and are usually the reason why you might see color smudges or scuffing on your postcards. The rollers physically grip and contact the postcard as it pushes it through to the correct ZIP code bin. If the roller applies too much pressure as it grips the mail, it may penetrate the color toner on the surface of the postcard, leaving scuff marks. Occasionally, the equipment may even rip the cards. Usually these marks occur about halfway to three-quarters of the way down on either side of the card where the high-speed belts make contact.

Postcards sent via first class that are deemed as undeliverable by the USPS (meaning that they cannot be delivered to the addressee) are especially vulnerable to scuffing and marking. The USPS takes extra steps to attempt to deliver this class of mail. These postcards are intentionally sent through the DBCS sorters several additional times to ensure that they are in fact “undeliverable” before they are deemed to be dead. Next time you get your first class undeliverable postcards returned to you- take note as to how scuffed they look. We actually add Coating on Fist Class cards mailed to smaller list - no charge. As these very often can experience these marks. We actually add UV Coating on Fist Class cards mailed to smaller list - no charge. As these very often can experience these marks.


Heavy Solid Colors

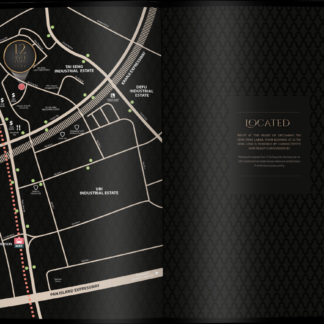
Avoid solid black backgrounds. We’ve found that solid black backgrounds show postcard damage more so than white or color ink backgrounds. We advise against solid black backgrounds if you are concerned by postcard damage

Protective Coatings Can Help
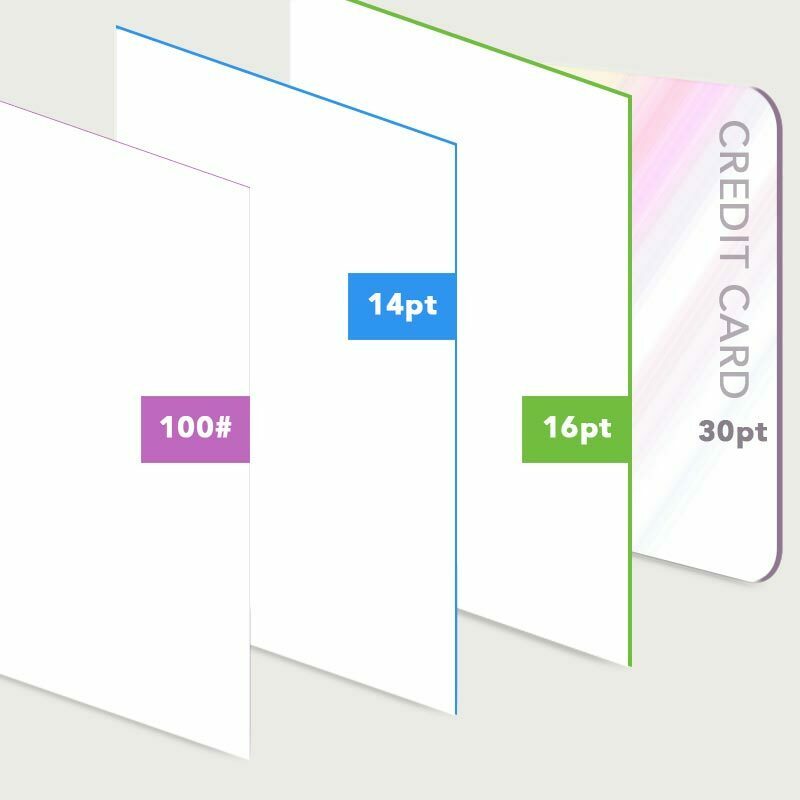
Using a high-quality coated paper cover stock (versus uncoated stock) and applying a protective UV coating to both the front and back of your postcards are two good options to help reduce the occurrence of these scuff marks HOWEVER ARE NO GUARANTEE against scuffing. Thicker coated paper adds paper integrity and a UV coating adds a slick, protective layer that helps glide the postcard through the sorting process a bit easier. At times however, thinner paper stock travels better through the process. To help facilitate clean, smudge-free mail pieces, WayBetterPostcard.com/Inmark Media. LLC offers a "UV Coating" option and only the GLOSS option will add any protective finish.

For a couple of extra pennies per card, these options may be worth adding. They may not totally eliminate marks made by the machines, but they can provide better quality, more consistent-looking delivered postcards. We actually add Coating on Fist Class cards mailed to smaller list - no charge. As these very often can experience these marks.

Lastly, Don’t Sweat Direct Mail Damage
If you receive or are informed that your card was “SMUDGED” it does not mean all the card you mailed were! In fact at times when you are added to a list (SEED CARD) and your address is outside of the targeted area or is in a less saturated geo area, the chances of smudging increase, however, most of the time the main targeted prospects cards - are not! This is due to more In-depth presorting at our plant and less need for USPS machines. Many of the newer postal processing machines have an auto fit so after 1 or two cards the adjust the grippers.

Direct mail damage can be difficult to accept, particularly for marketers who are more used to digital channels. When you’re working in email, any imperfections in a message can be diagnosed and corrected before the next mailing—if not sooner. In social, you can preview your ads, seeing exactly what your customers will see, before they go live. This just isn’t the case with direct mail.
The postal service faces a gargantuan task each day to sort and deliver our mail, and while this massive operation is very impressive it is also imperfect. Addressed mail with an Intelligent Barcode is typically machine-sorted three to eight times before delivery. When mail is identified as undeliverable, it can be machine-sorted up to an additional eight times before being returned to sender. That leaves many opportunities for the machines to leave grime behind on your postcards.

The good news is, consumers are very used to receiving mail with scuffs and smudges. They are most likely to simply tune out such noise and focus on your marketing message the same as if the postcard wasn’t damaged.
So, don’t become too worried if you’ve noticed small amounts of direct mail damage. However, if you are an WayBetterPostcard.com/Inmark Media. LLC customer and you are noticing excessive postcard damage, please let us know so that we can contact the Postmaster. Sometimes, USPS needs to better clean and calibrate sorting machines so that excessive grime on the rollers doesn’t cause direct mail damage.

What are th general postcard art file specs?

Basic Layout Instructions:
• Bleed: 1/8″ overall (.125 of an inch) will be trimmed off each side of your product. Your Final PDF file then should be .125” larger than the card you have selected. So a Jumbo Card is 5.5” Tall x 8.5” Wide. Your submitted file would be 5.75” Tall by 8.75” wide (added .125 to the left, right, top and bottom)
• Trim (cut) Line: This is where we will cut your card down from a much larger size press sheet to the final size that you ordered.
Borders- If you card has a border design, that border needs should be at least 1/4″ thick from the bleed line to ensure a balanced look
• Safe Area: This area is close to wear the card is trimmed to its final size.
Elements (i.e., text, graphs, tables) too close to or over the trim edge maybe trimmed further than you think due to manufacturing tolerances. Make sure no critical text or part of any image leaks into the Safe
Images bordering the trim should be expanded to the Bleed line so that that they “bleed” off the page

• Images/Photos: CMYK @ 300dpi (1200dpi for Bitmaps) Hi Res Print
• Flatten File: We recommend you flatted your final print ready card as you output the file. Especially if you are using transparencies or mask. This will assure that you exactly how your cards will look. Flattening at times can adjust all colors overall. All products we print are “Flattened”. This is part of our service so if you don’t flatten the card, it is fine, as we will at no charge. We just want you to beware that this can impact the entire card at times, based on how it was originally composed.

Tell me what a PDF is?

A Portable Document Format - PDF, is a universal file format that has captured all the elements of a printed document as an electronic image that you can view, navigate, print, or forward to someone else. PDFs make it possible to send formatted documents and have them appear on the recipient's monitor or printer as they were intended, regardless of installed fonts or software programs. They can be read by any computer without platform conflicts.

You can view PDF documents using Adobe Reader which is a free plugin for your web browser. If your computer does not have Adobe Reader, you may obtain a free copy here.

We use the PDF format to ensure you can see what your order looks like before you place it with no surprises and in the quickest time possible.

Shipping

Shipping Methods

Standard (1-3 Days) - UPS Ground
Next Business Day - UPS Next Day
Arrives by the End of the Next Business Day
Between 8am and PM in some areas (usually same time you receive your other ups/amazon goods)
Do not use if you need by a certain time
Next Business Day Early- UPS Next Day
Arrives by 12pm/Noon of the Next Business Day
Saturday - UPS Next Day Arrives on Saturday (between 8am-6pm)
Same Day Delivery – For Local Metro DC, MD and VA - (option will only appear for those areas covered)
Order Pick Up - 1-2 always free! After Hours Box available.
Expedited Order Pick Up - Certain products will have options to order and have guaranteed pick up time on the same day. you would make the appropriate selection in that product and then select Pick up In Checkout.

We offer various shipping/delivery methods.  All are selected at Checkout.  Select the options to best match your needs.

What time I ordered and how it affects delivery
VERY IMPORTANT Make sure you have selected a “Printing Time”  or production turnaround that will best match your desired delivery date when you place your order.
Days - Are Business Days (Monday- Friday)
Cut Off Time 3PM EST on all Business Days
Orders or Approvals after 3PM EST thus, are considered "the next business day"

Print material must be submitted and approved (if proof requested) by 3:00 pm (EST) the day before the requested delivery day. Any submission or approval after 3pm the day prior,  is considered the next day. Your order is not "picked from a shelf" it is custom printed and no shipping can take place until it is completed and ready to ship.

We have tried to incorporate these various user options to accommodate agents and often their need for quick turnaround or that maybe entering their orders after the close of the work day, thus still allowing them to order online seamlessly.  If you need anything by a certain time we suggestion you chose the most expedite shipping you see as well as expedited production with in the product your are ordering.

Changing Your Shipping Method or Destination
Please make sure to make your best selection when placing your order. It is difficult to change the shipping once you have entered your order. Make the best choice dont let dollars drive your peace of mind!. 87% of our orders are printed and shipped the same day, that is the business we are in! To do that we incorporate a great deal of automation. We can of course change the shipping type and ship to address at times, however it may effect the timing and additional charges may apply.

Our Guarantee - I didn’t receive my package
If you order has not arrived by when it was supposed to based on your  order submission time, product selections, print turnaround and shipping method, there will be no shipping charge, check your tracking number (sent via email when shipped and is in your order  go to: My Accounts > My Orders. If you still have no resolution please email or call us 24/7. We Monitor all outbound shipping regardless of the method and guarantee delivery within your specified sections .  In fact if we can, we will reprint and deliver (if possible for us to accomplish based on each occurrence) to the shipping address or your open house for any Local delivery. For Non-Llocal we will ship next day at our own expense if possible

How will I know my order has shipped
You will receive an email notification of shipment with tracking number and shipper (often a link) . Also, in your account, > My Account > My Orders - Shipping- toward the bottom of that screen is an option for order status. This show all your shipping details. Make sure you have our url marked as safe so your mail server does not place our notification in your spam, junk or other inboxes - we are not responsible for this occurring

Printing Time

Printing Times is the time required to produce/manufacture your order before it is ready to leave our facility either for shipment or pick up. IT IS NOT THE DELIVERY DATE or DELIVERY TIME!
It is calculated in Business Days (Monday – Friday)
after your order has been submitted and/or your proof is approved if you requested.
The Cut Off Time 3PM EST for all Business Days
Orders or Approvals after 3PM EST thus, are considered "the next business day"

  • Standard Service – Orders submitted by 3 pm on a business day, will be completed by the end of the second business day and ready to ship. Larger brochures over 6 Pages, might be the second business day.
  • Next Day – Orders submitted by 3 pm on a business day, will be completed by the end of the next business day and ready to ship. Larger brochures over 6 Pages, might be an additional business day.
  • Same Day – Orders submitted by 10 am on a business day will be completed by the end of the business day and ready to ship.

What time I ordered and how it affects delivery
Print material must be submitted and approved (if proof requested) by 3:00 pm (EST) the day before the requested delivery day. Any submission or approval after 3pm the day prior,  is considered the next day. Your order is not "picked from a shelf" it is custom printed and no shipping can take place until it is completed and ready to ship.
Days - Are Business Days (Monday- Friday)
Cut Off Time 3PM EST on all Business Days
Orders or Approvals after 3PM EST thus, are considered "the next business day"

We have tried to incorporate these various user options to accommodate agents and often their need for quick turnaround or that maybe entering their orders after the close of the work day, thus still allowing them to order online seamlessly.  If you need anything by a certain time we suggestion you chose the most expedite shipping you see as well as expedited production with in the product your are ordering.

We always do our best to move your order in and out of production as fast as possible. We use multiple printing presses and various finishing  equipment. All work is done right here in our shop  however every job is has its own art work and specifications and thus really is custom!

List Builder - Condo/Apt Counts

Condo / Apt Counts


1. Select Condo / Apt Counts from dropdown

2. First select: Apartments (RENTALS) or Condos (Condos, Co-Ops other types of multi-dwellings) then make your Geo Selects: State, City and Zip of the buildings you want to target for your mailing

3. Once your Geo Selects are complete, a drop down will appear you can select from.

4. When you have competed your selection, Click "Let's Continue"

5. You will return to the Configure product area to finish your build/specs. Your order total has been updated.

List Builder - Absentee/Renters (SFH)

Absentee - Renters


1. You can choose between Absentee (Non Owner Occupant / Investors) or Presumed renters of real property (not large commercial rentals)

2. Make your property and demographic selections

List Builder - Real Estate Data Filters

Real Estate Data Filters


1. Select Real Estate Data Filters

2. Two options appear - Use Geographic Area (most popular). Type in any description of the area you want to target for your mailing. Blocks-/Streets- Neighborhoods- Subs, Buildings, Zip Code etc.

3. Your first area will contain some predetermined database we have setup to compile or for Custom- Build My Own. These our ideal for agent marketing.

4. Life Stages - We can compile a list based on these popular stages in life.

5. Custom- Build My Own will provide you some real estate centric data
using both property and demographic filters

6. Additional Data Filers - Custom- Build My Own.

7. Your budget will determine the Quantity to be mailed. There are often more targets than budget dollars, this tool will allow you to easily determine you list total and then continue.

8. You'll return to the "Configure Product" section to finish your product build The Quantity total at the the bottom, will be updated (you can adjust it here as well.

List Builder - Closest Relevant Homes - Advanced

Closest Relevant Homes - Option 2 Advanced


1. Closest Relevant Homes - Option 2 w/data filters

2. Select Option 2, if you want an alternative area to mail or if you want to add additional real estate centric data filers to your audience

3. Here you can 1) Change the area that you want to Mail 2) Use our custom compiler "Likely to List" or 3) Choose your own data filters

4. Make your selections here

5. Enter the quantity you want to mail for this campaign, and continue

6. Continue to Configure your card build. The quantity has been updated. You can change the quantity here aswell

List Builder - Closest Relevant Homes

Closest Relevant Homes - Option 1 (Most Popular)

Made by WBP with Scribe


1. Select Closest Relevant Homes- Option 1 (most popular)

2. Using the featured address of your card (or typed- in the "Configure" section) we will compile a list of real property (SFH or Multi-Dwelling depending the featured address).

3. Enter the QUANITY you want to mail for this campaign here, and continue.

4. You'll return to "Configure & Price" to complete your other selections Order Quantity has been updated, however you can still change the total if you would like

List Builder- Subdivision Tool

How To Use The Subdivision Count Tool

Step by Step walk through for using the Metro DC Subdivision - Neighborhood Count tool to define your mailing list.


1. From - Select List Option > Subdivision

2. The Metro DC-MD-VA database selector will open. Start by selecting the "State" where the subdivision is located, then select the City and State

3. When your top Geo Selects are done, a drop down will appear with all the subdivisions and to the right you can select the types of properties you want as well

4. Three streets are in that subdivision and the block ranges will appears as well as the house type and the count for the Block/Street. The total was 64

5. Also wanted was "ALTA VISTA TERRACE" for this mailing so after selecting Alta Vista (or if it was already selected) I held down the "ALT" key on keyboard and selected "ALTA VISTA TERRECE" Note a few subdivisions will span 2 different zip codes. If you want both zip codes, you would make your initial selections then go back up to and change State, City, Zip again and add to your current list.

6. Now below you will the original selection and then the add or addition subdvivon with its Block and Street details. My quantity has increased to "307" as well.

7. DELETE A BLOCK/STREET - To edit or delete a block and street on the left is a trashcan/delete button, once selected it will remove that from your count and list.

8. When finished select in the blue tab > Let's Continue
The database will close, Your count total will populate the quantity for your order.

What is a Proof?

A representation of what the finished printed product will look like. They are designed to simulate, as closely as possible, the exact appearance a job will take when printed on our press. It is used to make sure any mistakes or errors are caught before the order goes to the printing press. It is for your benefit that you look over your proof carefully to make sure any spelling, grammatical, or punctuation errors are caught at this stage along with photo selection and location, and legibility. Your order will be printed exactly as it appears on the proof (not including exact color match). At the same time, you agree to verify the proof and any mistakes found after your approval of the proof that require a reprint due to typographical errors will be at your expense

(2) Types of Proofs

E Proof - A Low res pdf file we email or send a link to you for your review

Hard Proof - an actual printed sample that will represent what your finished product will  look like. This may not include any specific binding or booklet making or may also be on a larger sheet.

VERY IMPORTYANT - Any request for Proof either E Proof will effect your Print Turnaround time and thus your delivery time. We suggest you review all aspects of your project  be ready to go.


What print ready file recommendations should I follow?

Print-Ready Files It a common term used every day in commercial printing, but it can mean different things. They are essential elements your file needs to ensure it translates from your computer to the printing press accurately and consistently without the need for any additional edits or adjustments. PDF Format Whether you’re designing a postcard, property brochures or perfect bound marketing booklets the first step in creating a file for online printing is knowing what format it’s in. A PDF is the best format. Other File Formats Other formats have broader editing capabilities, such as Adobe Photoshop (.psd format), Illustrator (.ai format) or InDesign (.indd/imdl). They can work however you have Package and Zip with Links and Font Folders and save as an IMDL otherwise they cannot be used. Formats like Microsoft Document (.docx), PowerPoint (.ppx) or Publisher (.pub) are not optimized for a printing press. And formats like .png and .jpeg. are static images that, if designed correctly, can be printed, but there will most likely be a charge to convert them. Nothing will advance however without your approval. Print-Ready File Requirements To ensure your file is ready for press and other online printing services, follow these guidelines: All of your images should be high resolution. We recommend images are 300 PPI for small format projects like booklets, cards or brochures, and 150 PPI for large format projects like custom signs and banners.

Make sure your files use CMYK colors for the most accurate comparison between what you see on your screen and what is produced with the press (not guaranteed to match exactly)

Your design files must have the appropriate bleed to ensure any variances in commercial production don’t affect your print. .125″ or 1/8″ variance in the event that the machines drift slightly in any direction. Because of this, your finished size should be expanded by 1/4″. Thus the final PDF file size for a 8.5×11 Brochure will actually be 8.75 x 11.25

Your design files should have all transparent objects, images or drop shadows flattened. PMS Pantone colors will be converted on the fly to CMKY unless for Signs and you have ordered PMS Colors.

General Rule As long as you have a PDF with high resolution images in the CMYK color space with the appropriate bleed, you’ll be on your way to creating the correct print-ready file and your own exceptional project!

What is Use My List On File

Use one of your list or multiple lists we have on file for you in our list manager platform

- My Mailing List. We can build, manage, maintain, and update all your mailing lists - Geo Farms, SOI, Seller Direct/Golden Letters, Do Not Mail and more! Access this via your account page (Menu up top > "My Account"), then open > "My Mailing List" on the left. Here you can see the list name, number of addresses in that list and download that list. You can add or delete records, upload any updated list or even order a new list or request a count.

Can I save a list I upload to My Mailing List?

If you want to save the list9s) you are uploading, for an order you can select > Yes. We will then add it to your My Mailing List so that it will be available next time in the “Use My List on File” option
Note: You can also add mailing list(s) from the Top Menu > My Account

How many list can I upload at once for a mailing?

You can upload your own list(s) up to 4 for any single direct mail postcard campaign right here. (see multiple lists below for more details)

Upload Multiple List
You can upload up to 4 lists for any single mailing. We will combine your lists and remove duplicates in the same manner as you selected above. If one of your lists is name with or similar to and SOI or Client List, those are what we refer to as the “Surviving Record”. Thus if that record or address is on a another list in your upload, then the SOI/Client List info for that record, is the one we will maintain.

Our design guideline templates will help you ensure your design/layout will meet all your expectations. You might not to this everyday as we do but all you need is a little help. They will guide in your layout and provide not only the overall dimensions but the trim and safe and bleeds lines as well. Templates are available to download below.

The templates include bleeds, safe zones and the areas and address block, to keep clear so that we meet all USPS Regulations as well as 100% compatible for the best automation-based rates!
Design Tip: Don’t worry about adding the permit information to your design if we are addressing and mailing your postcard. At no extra charge you can use our permit and we will add it for you; this is just another way we make sure your direct mail postcard is mail-ready.

Basic Layout Instructions:
• Bleed: 1/8″ overall (.125 of an inch) will be trimmed off each side of your product. Your Final PDF file then should be .125” larger than the card you have selected. So a Jumbo Card is 5.5” Tall x 8.5” Wide. Your submitted file would be 5.75” Tall by 8.75” wide (added .125 to the left, right, top and bottom)

• Trim (cut) Line: This is where we will cut your card down from a much larger size press sheet to the final size that you ordered.
Borders- If you card has a border design, that border needs should be at least 1/4″ thick from the bleed line to ensure a balanced look

• Safe Area: This area is close to wear the card is trimmed to its final size.
Elements (i.e., text, graphs, tables) too close to or over the trim edge maybe trimmed further than you think due to manufacturing tolerances. Make sure no critical text or part of any image leaks into the Safe
Images bordering the trim should be expanded to the Bleed line so that that they “bleed” off the page

• Images/Photos: CMYK @ 300dpi (1200dpi for Bitmaps) Hi Res Print

• Flatten File: We recommend you flatted your final print ready card as you output the file. Especially if you are using transparencies or mask. This will assure that you exactly how your cards will look. Flattening at times can adjust all colors overall. All products we print are “Flattened”. This is part of our service so if you don’t flatten the card, it is fine, as we will at no charge. We just want you to beware that this can impact the entire card at times, based on how it was originally composed.

You may also like…