

How Should I Set Up My Bleed?
What Is Full Bleed?
Bleed is the edge of the printed page that is trimmed off during binding. Simple as that. Whenever a printer or bookbinder (and really any other kind of printing like our postcards, signs, note card, posters, etc.) prints a sheet of paper or any media, they do so slightly larger than the final size. Then they trim all the book’s pages so they appear uniform after being bound into a book.
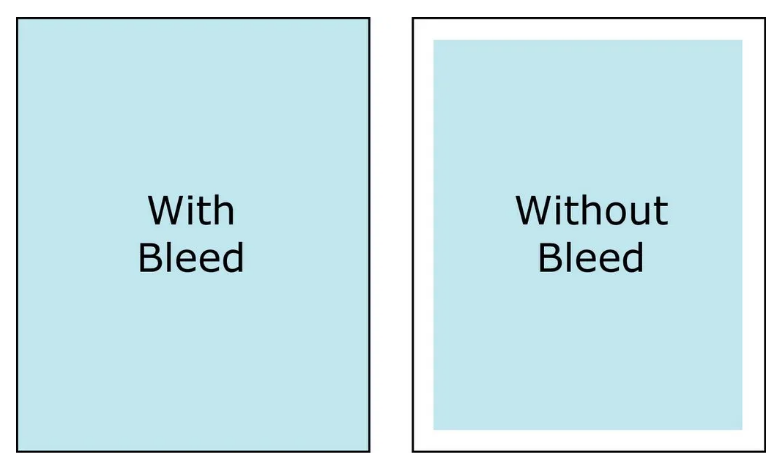
Bleed must extend past the cut-line and will be trimmed from the product during the final cutting phase. When the image is required to extend all the way to the edge, bleed is needed to preserve the finished look and the quality of the final product.
Bleed must extend past the cut-line and will be trimmed from the product during the final cutting phase. When the image is required to extend all the way to the edge, bleed is needed to preserve the finished look and the quality of the final product.
- The bleed for All Digital and offset Print Products is 0.125".
- The bleed for Signs, Posters, Display or Large Format Products is 0.250".
Please keep all text at least 0.25" inside the cut-line. This Safe Zone will make sure no content is compromised.
Details on Bleed Settings for Print Collateral
Our design guideline templates in each product (Tab) , will help you ensure your design/layout will meet all your expectations. You might not do this everyday as we do, but all you need is a little help! They will guide in your layout and provide not only the overall dimensions but the trim, safe and bleeds lines so that all your content and images will print and display just as you want. Complete PDF Templates can be downloaded on the right
Below find a Quick Reference Image and Print Ready File Specs
Design Tip: If you are exporting from your company's design center, try to Export or Save to the setting/choice similar to "send to commercial printer" or hi Re PDF. If you are unsure of all these try to select the highest quality you can and we will adjust all here, prior to print. If we make any non print ready changes, we will send you a proof.
Print Ready File/Layout Instructions:
• Bleed: 1/8″ overall (.125 of an inch) will be trimmed off each side of your product. Your Final PDF file then should be .125” larger than the card you have selected. So a Jumbo Card is 5.5” Tall x 8.5” Wide. Your submitted file would be 5.75” Tall by 8.75” wide (added .125 to the left, right, top and bottom).
• Trim (cut) Line: This is where we will cut your card down from a much larger size press sheet to the final size that you ordered.
Borders- If you card has a border design, that border needs should be at least 1/4″ thick from the bleed line to ensure a balanced look.
• Safe Area: This area is close to wear the card is trimmed to its final size.
Elements (i.e., text, graphs, tables) too close to or over the trim edge maybe trimmed further than you think due to manufacturing tolerances. Make sure no critical text or part of any image leaks into the Safe.
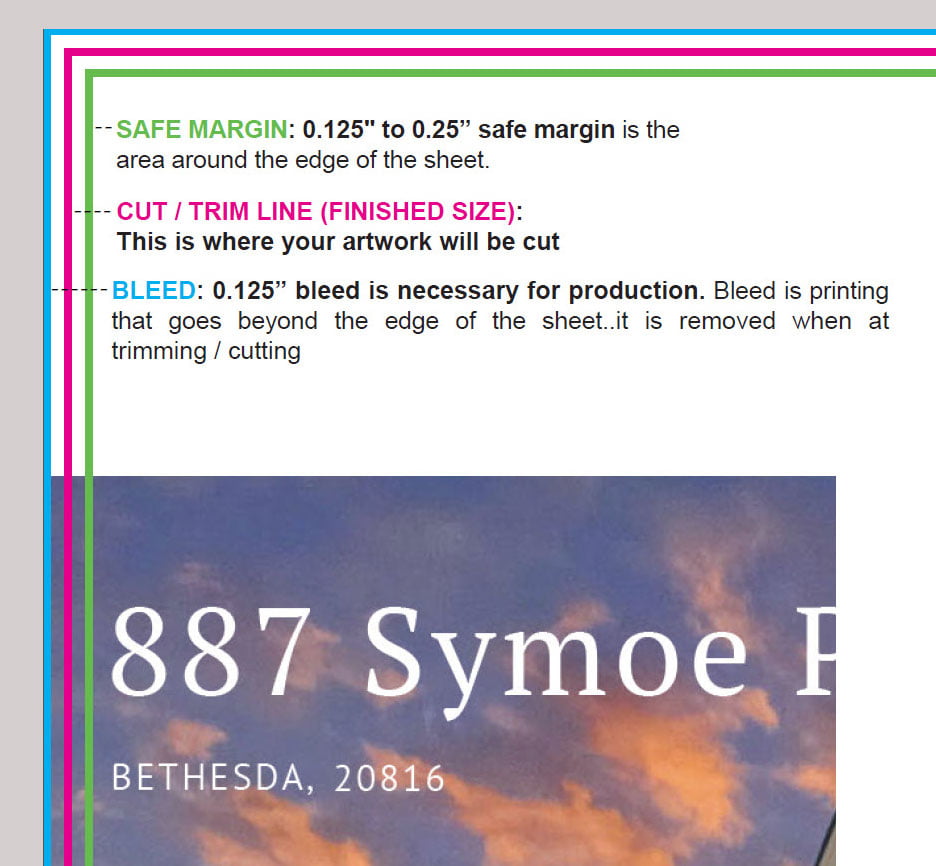
Images bordering the trim should be expanded to the Bleed line so that that they “bleed” off the page.
• Images/Photos: CMYK @ 300dpi (1200dpi for Bitmaps) Hi Res Print.
• Flatten File: We recommend you flatted your final print ready card as you output the file. Especially if you are using transparencies or mask. This will assure that you exactly how your cards will look. Flattening at times can adjust all colors overall. All products we print are “Flattened”. This is part of our service so if you don’t flatten the card, it is fine, as we will at no charge. We just want you to beware that this can impact the entire card at times, based on how it was originally composed.